October 2018
Advancing the art and understanding of fine woodworking!
Fall Mini-Symposium on Cabinet Making October 13th
The Woodworkers Guild of Georgia will hold its annual Fall Mini-Symposium at Suwanee Lumber on Saturday, October 13th. If you have ever wanted to make cabinets for your kitchen, bathroom, etc., plan to attend. Paul Fussell, a former Guild President and woodworking teacher will show all the details of cabinet building.
Suwanee Lumber is located at 540 Satellite Blvd. in Suwanee 30024. 770-945- 2102.
The session runs from 9:00 AM to noon, with registration, coffee & donuts at 8:30.
Paul will show us how to construct a base cabinet with a drawer and two kinds of doors, with and without face frames. He will discuss the pros and cons of construction details.
The Guild will provide coffee and donuts as well as hard chairs. Bring you own chairs if you want more comfort/softness. The Presentation ends at noon. Lunch will not be provided, and we will have a break so you can have time to buy lumber. And, they will be open until 1:00 PM.
Guild Charity Toy Building to Conclude Monday, October 8th
The Fall Mini-Symposium replaces the Guild "2nd Monday" Monthly Meeting, but we are planning to finish the toys on Monday, October 8th at 7:00 PM at Woodcraft, as we did last year.
There will be no meeting or Show 'N Tell, but plan to stop by and help out with this noble cause.
Last year, an enjoyable time was had by all !
Miniature Woodworking with Kelle Risoli at September Meeting
By Jim Wright
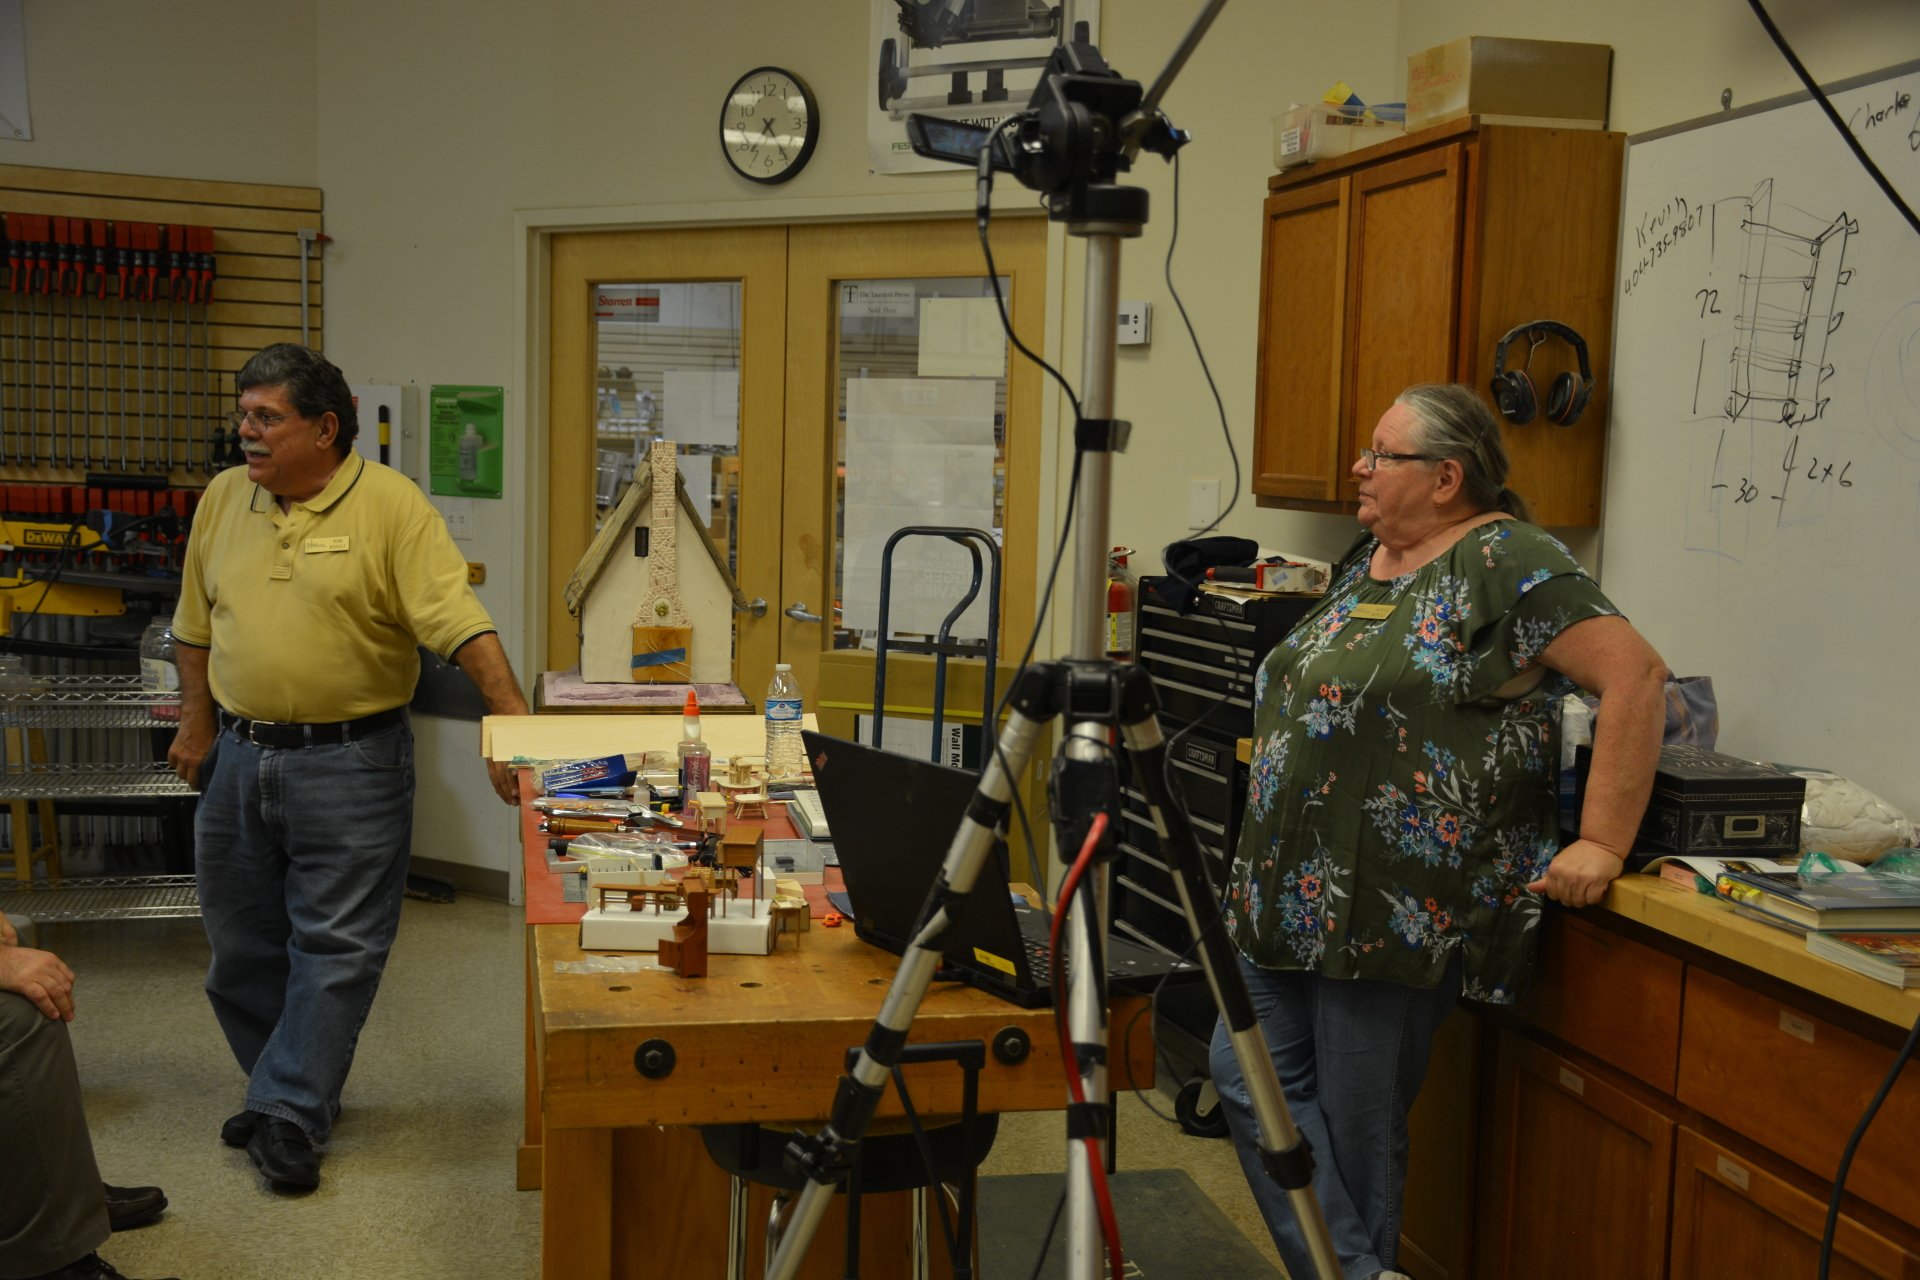
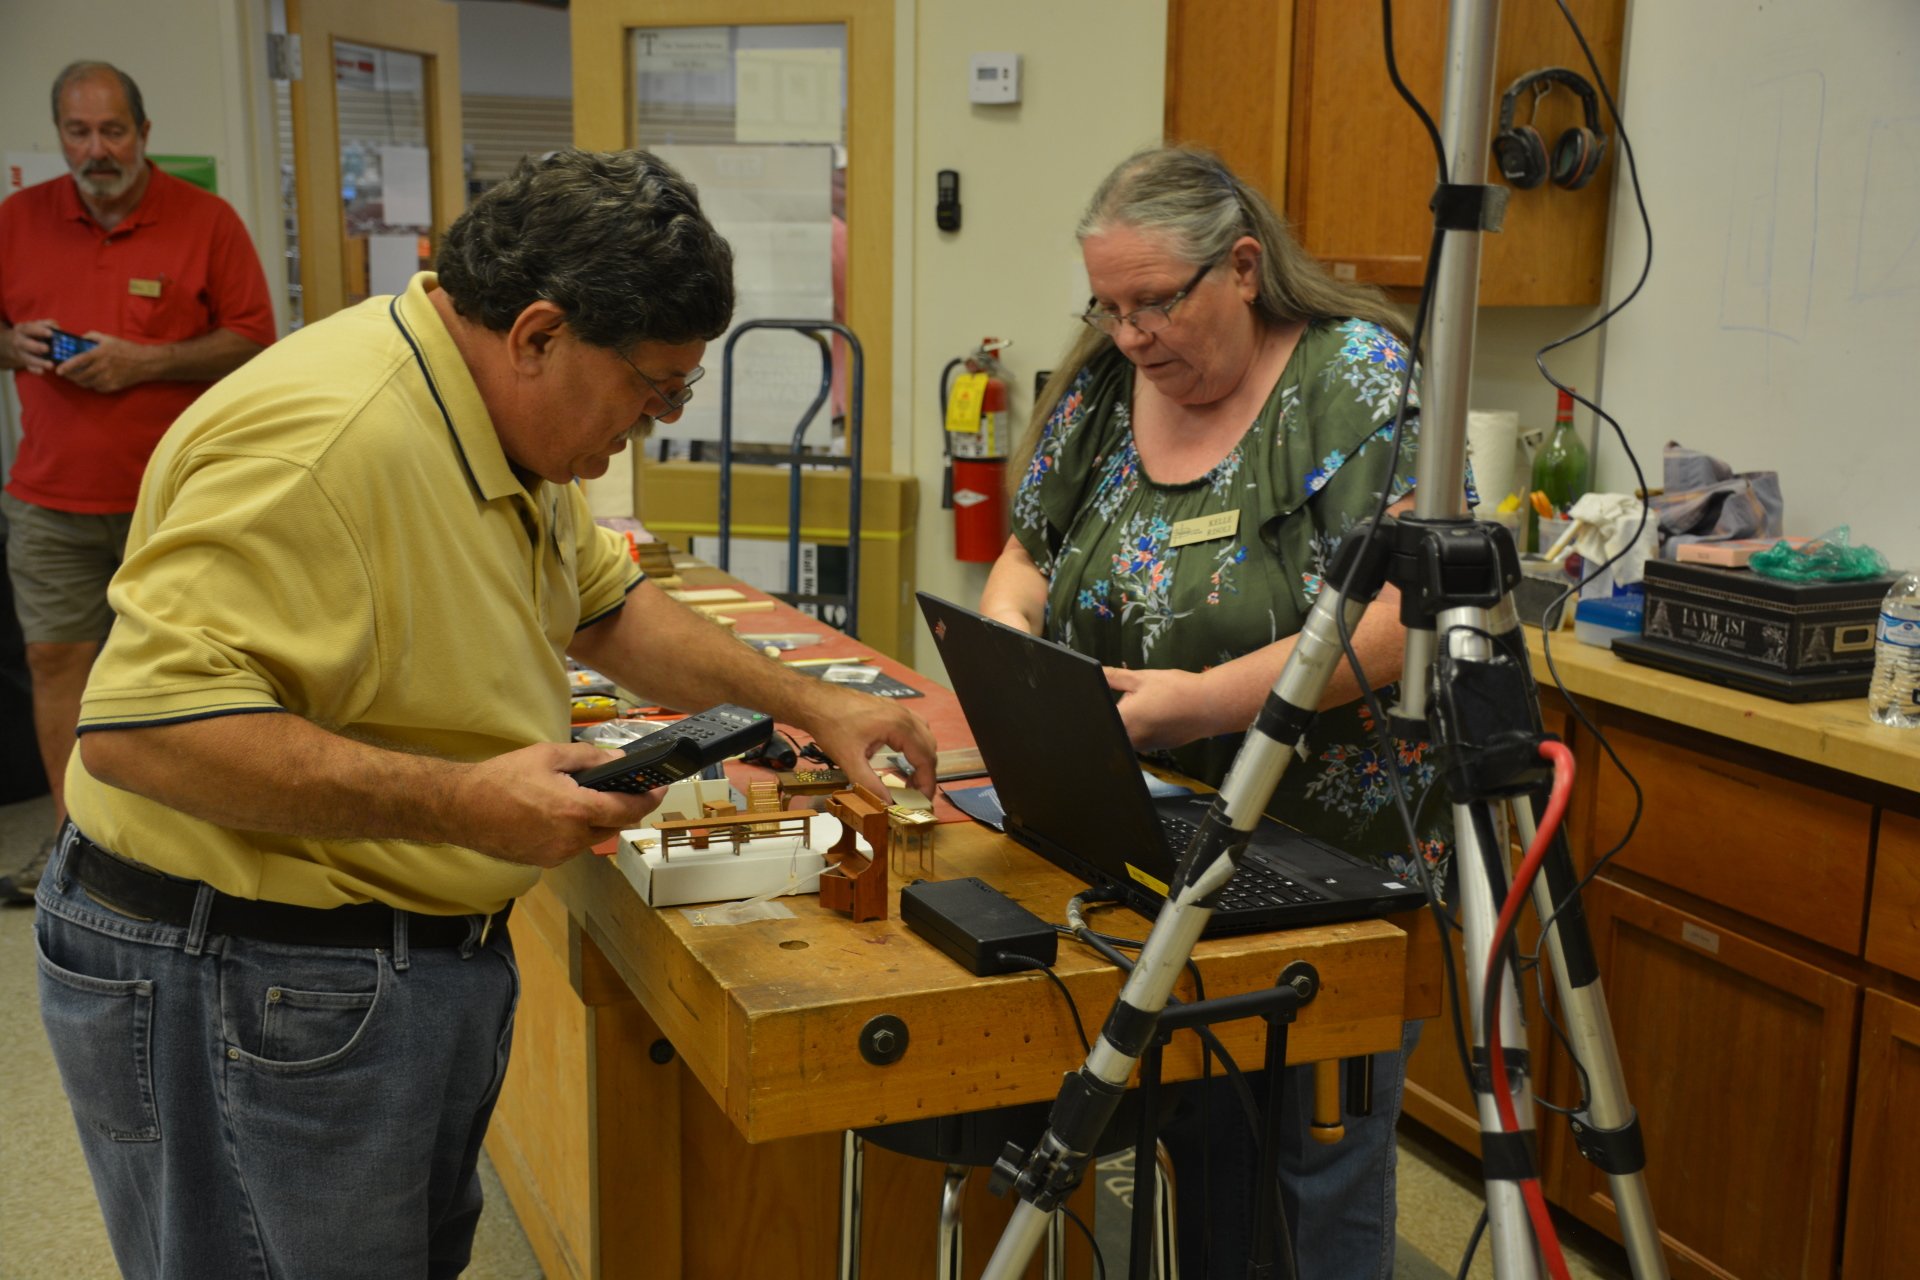
At our September Guild meeting, Kelle Risoli
gave an excellent and very informative presentation on miniature woodworking.
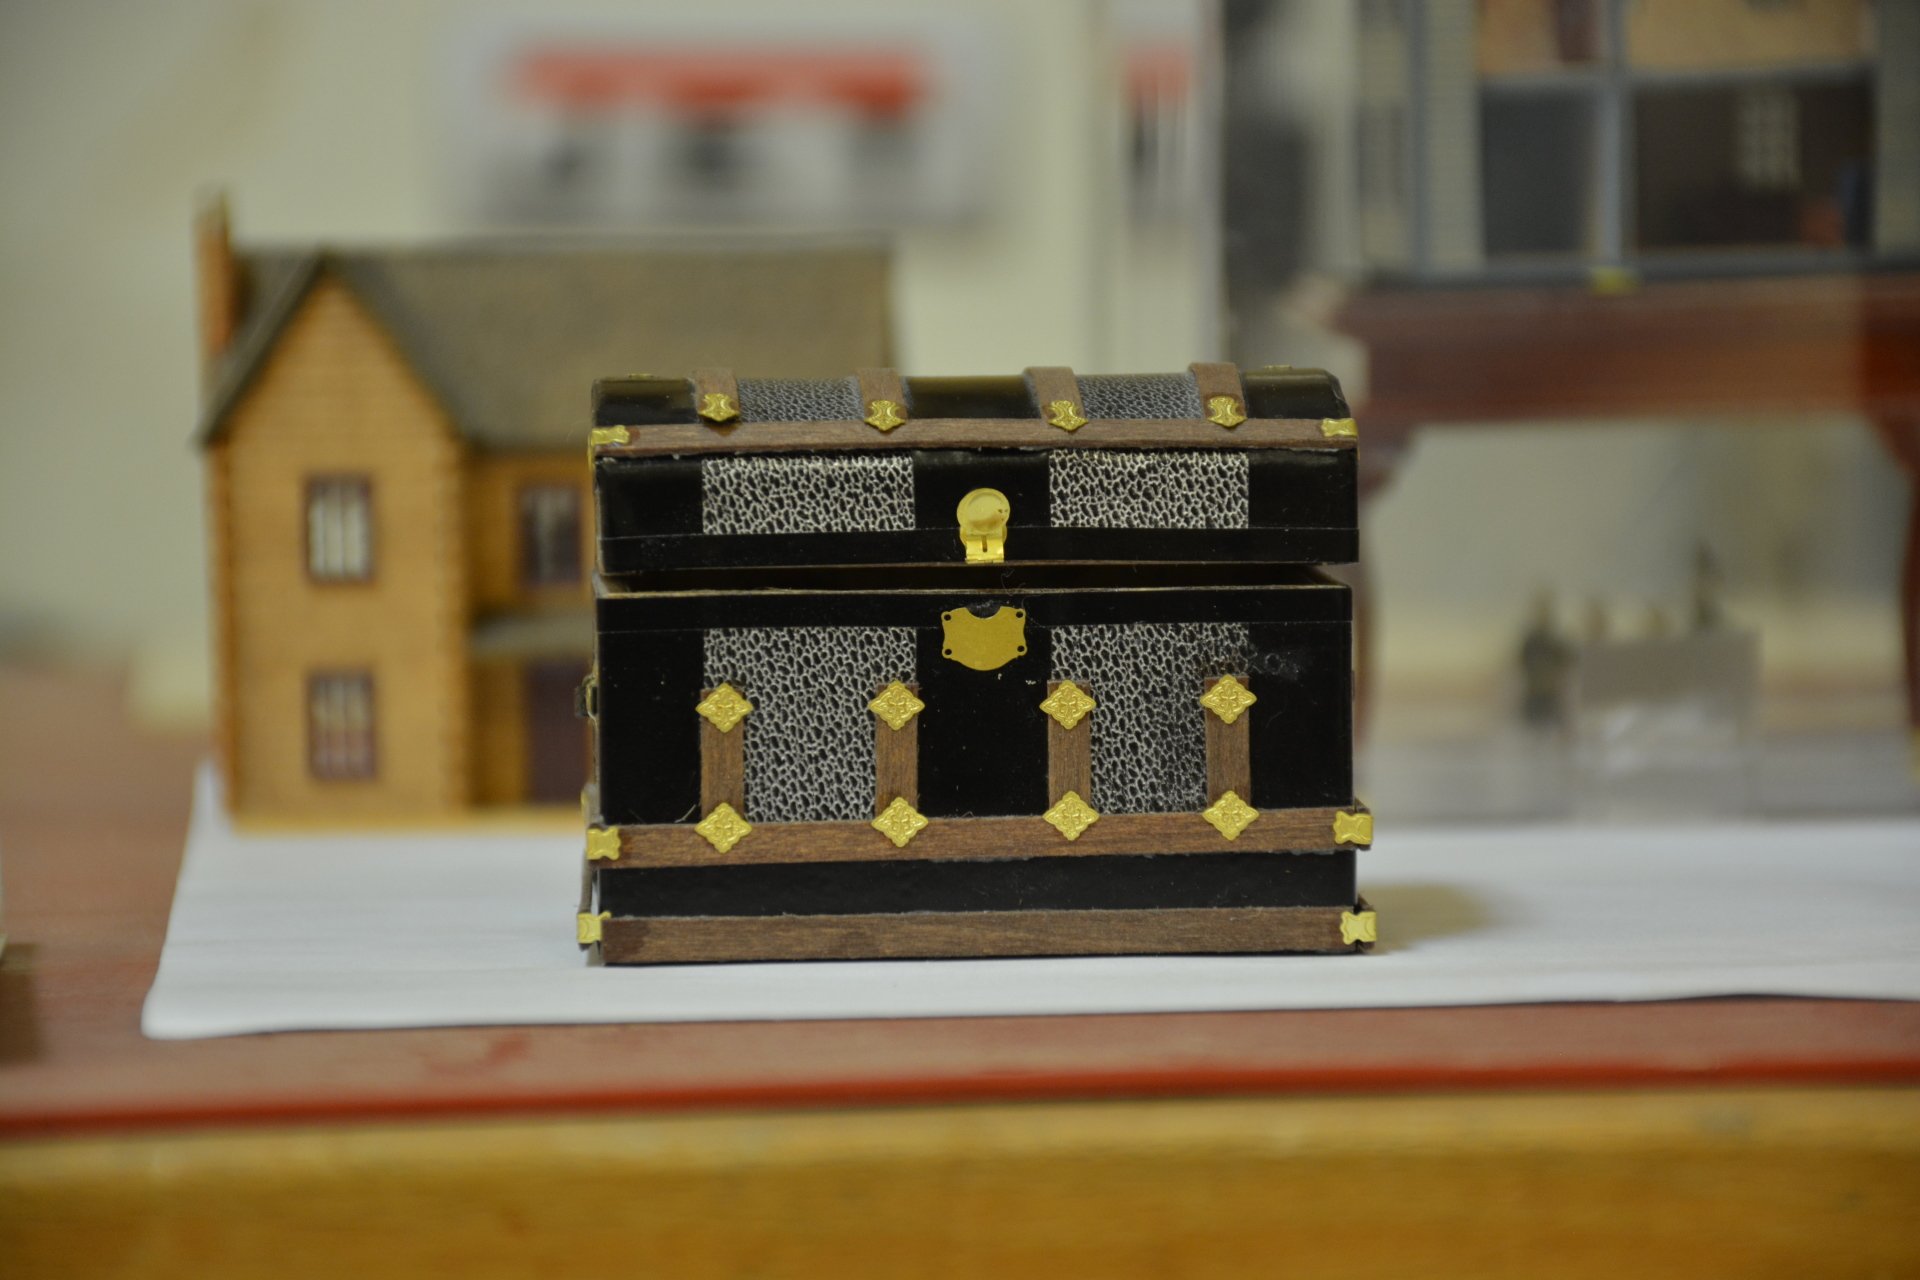
She brought numerous examples she made and purchased. She also displayed pictures of extremely valuable work by recognized experts. She showed us the magnetic layout plates used to assemble such tiny, intricate components.
In addition to many other examples of her work, Kelle also brought the miniature cottage she made, which has such excellent detail work both inside and out. Photographs of it could easily be mistaken for a full-size house!
She discussed in detail the various aspects of miniature woodworking in her well-organized presentation.
The important use of scale, which can vary from 1:6 to 1:48 for a given project, was explained.
Additionally, the small and special tools for shaping and joining were shown. Hardware choices, the use of materials other than wood for tiny items such as hinges for functional doors, and wood species options - basswood, pear, holly, cherry, and oak - were also presented.
After her presentation, it reminded me of the fabulous exhibit I saw last October from LAIKA Studios at the Portland Art Museum.
LAIKA Studios is the world famous creative arts group located near Portland, Oregon, which has produced the best stop-action photography movies ever made.
So why is this important? To me, this form of the woodworking arts offers us an entree into the stories our grandchildren most enjoy. Those stories are full of examples of the ideals we want future generations to value. This art form offers us a way to relate to them and speak inside their conversations.
That last thought, to me, is a key component of how we help assure the goodness and principled behavior the World needs. So, as you review the pictures of Kelle's presentation, consider the possibilities in such work to represent stories and develop relationships with your grandchildren to create their own pieces and stories.
Additionally, you can search for Portland Art Museum and LAIKA Studios for more examples of their work.
A few pictures I took of the exhibit on my visit there the 17th of October, 2017 are included below.


Below are Jim's Photos from the LAIKA Studios at the Portland Art Museum
President’s Message - October 2018
Gary Fader
Your Guild Needs You
It’s coming up on that time of year when several Woodworkers Guild Board members will end their terms, or take on different positions, and leave vacancies. Being on the Board is a great experience, mostly because it’s like belonging to a small club of really great people, and you get to meet many more Guild members than you typically would. I say this because it may be a bit unusual to have a confluence of people that really enjoy being with each other and making a difference for the good of the Guild and it’s members. This is also an opportunity for new members engage with Guild activities and key members.
A typical concern is the amount of time a person must dedicate to being on the Board. Yes, there are some positions that require some time, such as being Treasurer, but most require only a few hours per week, and it’s intermittent or seasonal. The Board meets for an hour and a half once per month, and attending every meeting is desirable, but not required.
The following Board positions are now in need for new Directors for 2019:
• Programs Director - Heads up a committee that selects the monthly programs and Mini-Symposium topics, and arranges for speakers
• Communications Director - Responsible for coordinating communication of WWG matters to members and non-members, such as emails regarding meetings and other Guild activities
• Scholarship Director - Responsible for overall management of the Guild’s scholarship program
In addition, we need members to participate on committees and provide assistance, such as the Programs Committee, Membership Committee, and audio/visual/photography activities.
So, consider helping sustain and advance your favorite group and give us some of your time for a year or so. If it would help, talk to the current Board member in a position of interest to you, or to John Jones or myself, about what would be involved. I truly expect you would enjoy the experience and be satisfied with the sense of accomplishment. The Guild cannot function well without adequate leadership and member participation.
Guild Charity Toy Building
Approximately 15 Guild members met at Woodcraft in the afternoon on September 13th and enjoyed sanding and shaping, as well as branding the Guild Logo on the toy trucks and puzzles for this year's charity to the Children's Hospital. Below are a few photos from the event.
Final assembly and glue-up will be completed on Monday, October 8th at 7:00 PM at Woodcraft.
A great time was had by All last year. Hope you can participate and enjoy the camaraderie on the 8th.
WHAT I LEARNED OR CONFIRMED ABOUT FINISHING
AUGUST 9 AND 16, 2018 - 6:00 to 9:00
WOODCRAFT
David Jervis - Instructor
By Milton Miller - Grandpas Workshop + 7
Guild Scholarship Recipient
We all are affected by the positive and negative experiences we have had related to finishing. My goal was to improve upon my experiences and select my “Go To Finishes” for various woods and projects.
I tell my seven grandchildren that one of the major differences between a WOODWORKER and a CRAFTSMAN is the manner in which they finish their project.
For this report I have divided it into two types of finishes — penetrating and build-up.
PENETRATING WOULD BE OILS SUCH AS WATCO OR TRIED AND TRUE DANISH OIL.
Applied with a rag, foam brush, or quality paint brush.
Apply heavy coat, let soak in for 15 to 20 minutes, then wipe off and apply a second and/or third coat.
Let dry at least 8 hours.
Lesson Learned—don’t apply Danish Oil over Oil Stain—it just doesn’t dry well.
BUILD-UP WOULD BE GENERAL FINISH—ARM-R-SEAL-OIL AND URETHANE OR WATERLOX.
Apply with quality brush that is used for this purpose only.
Usually requires 3 to 5 coats, depending on wood and sheen desired.
Lessons Learned—if you don’t seal a General Finish can well, it will skim over and you will waste a lot of finish.
Stains are important as well as waxing, depending on how the project will be used.
Making Hand Cut Dovetails
By Michael Lawsky
The last time I tried making dovetails was about 25 years ago. I thought I’d be all into this hobby of hand-made woodworking, so I picked up the hand tools and was ready to go. I made a few pieces of furniture, none of them using dovetails, then realized I’d better get into power tools if I was going to make a dent in our furniture needs. After a couple of sad tries with dovetails, I put it aside.
Fast forward to today, we have no furniture needs but I do have a lot of time. The course at Highland would be a great way to pick up where I left off - or rather scrapping my memory of those sad attempts and starting over.
My previous experience with a class at Highland was great and eventually resulted in more turned bowls than I or my heirs would ever need.
My class was made up of seven students, all in different phases of woodworking experience but all completely new at hand cutting dovetails. Perfect! Maybe mine won’t be the worst. Our instructor was Jay Wiggins, an experienced furniture maker and woodworking instructor. Our well-lit classroom consisted of our seven workbenches and instructor’s bench, whiteboard and a few scattered machines. If you’ve taken a course at Highland you’ll recognize the scene.
If we hadn’t brought our own tools there was an array of tools from which we could choose for the task. I chose the chisels, square, marking gauge, saw (Japanese dovetail saw), sliding bevel, and pencil. Obviously, I hadn’t brought my own tools. Jay explained that one could use either the Western woodworkers’ dovetail saw which cuts on the push stroke, or the Japanese version which cuts on the pull stroke. He noted that most beginners found it easier to begin a cut on the pull stroke, but the end result is the same. Jay demonstrated the making of a dovetail at the instructor’s bench with the class crowded around. The process seemed pretty straightforward.
First and foremost (really foremost) is measuring. He drew a seven-inch line perpendicular to an edge of a piece of paper, then measured one inch out from the line at the edge and drew a line (the hypotenuse of the triangle) from the one-inch mark to the top of the first line. I describe this because it turns out to be pretty simple to determine
the angle of the dove’s tail. This angle was 1:7. A six-inch line would be 1:6 and so on. Math and angle degrees are unnecessary. What is necessary, though, is to use a ratio of between 1:6 and 1:8 on a structural dovetail so that the points of the tail would not be so thin as to break off. It depends on the wood and the use, so there are no hard rules. After a thorough demonstration, we were off to our benches.
The number of tails depends on wood size and desired look. Our wood was 3/4 inch thick and almost 4 inches wide, so we used two tails spaced evenly apart with a half tail at each end. It’s necessary to have half tails at the ends. I won’t go into detail about the rest of the tail measurements but they are meant to determine what gets cut away and what stays. Lines are drawn in pencil using the angle gauge set to the line on the paper. The lines are on the front, back, and end of the wood and serve as the cutting guides for the saw. It’s important to clearly mark the waste part so you always cut on the waste side of the line. Even so, I cut on the wrong side of the line, which Jay and I decided was a learning experience, so I’ll never do it again. I did it again.
I learned that in cutting the tails and the pins (the opposites of the tails) it’s important to not saw off the line as it’s an important reference all the way through and results in higher precision and fewer gaps. I also found that the sawing was the hardest part. It took some concentration and constant checking to make sure the saw and cut was against the line on all three sides of the wood. When the cuts were done, the waste was then chopped out with a chisel. I thought this would be difficult and messy. In fact, it was quite easy. Done in several steps, it consisted of a chop at the base of waste between the tails and then a chop into the end grain. As with every other use, a sharp chisel is required. The tails are then perfected
(I use this term loosely) with the chisel so that the sides are smooth and angles are sharp.
On to the pins. To make the pins, the tails are outlined on the edge of the other piece of wood. Lines are then drawn on both sides of the wood straight down from the edge lines to form the cutting guides. I should mention that the marking gauge was used to determine the depth of both the tails and pins, denoting the ends of the lines and based on the thickness of the other piece of wood. Saw cuts are made on the lines as they were with the pins and the (well-marked) waste is chopped out. After initial cleaning, the joint is tested and refined so it fits together. This required trial and, well, trial again, because you don’t want an error. My joint took a few mallet taps to fit because I had just done some body work on my car and that was my mind-set. Slight taps are fine as you want a tight fit but too hard a tap could result in a cracked piece of wood so if it does’t fit with light taps, we go back to the chisel.
Well, I actually made a several dovetail joints and found that though it requires practice (what doesn’t?) it’s not really that hard. When I make them in my shop It will be with thinner wood so the cutting will not be as challenging. More important, however, is the lesson of learning from experts and how that vastly increases the speed to success.
This article is by a Guild member who, at a recent Guild meeting raffle, won this partially-funded class held at Patron Sponsor Highland Woodworking.
START PLANNING YOUR PROJECTS FOR THE DECEMBER HOLIDAY PARTY
and THE WOODWORKING SHOW NEXT SPRING !
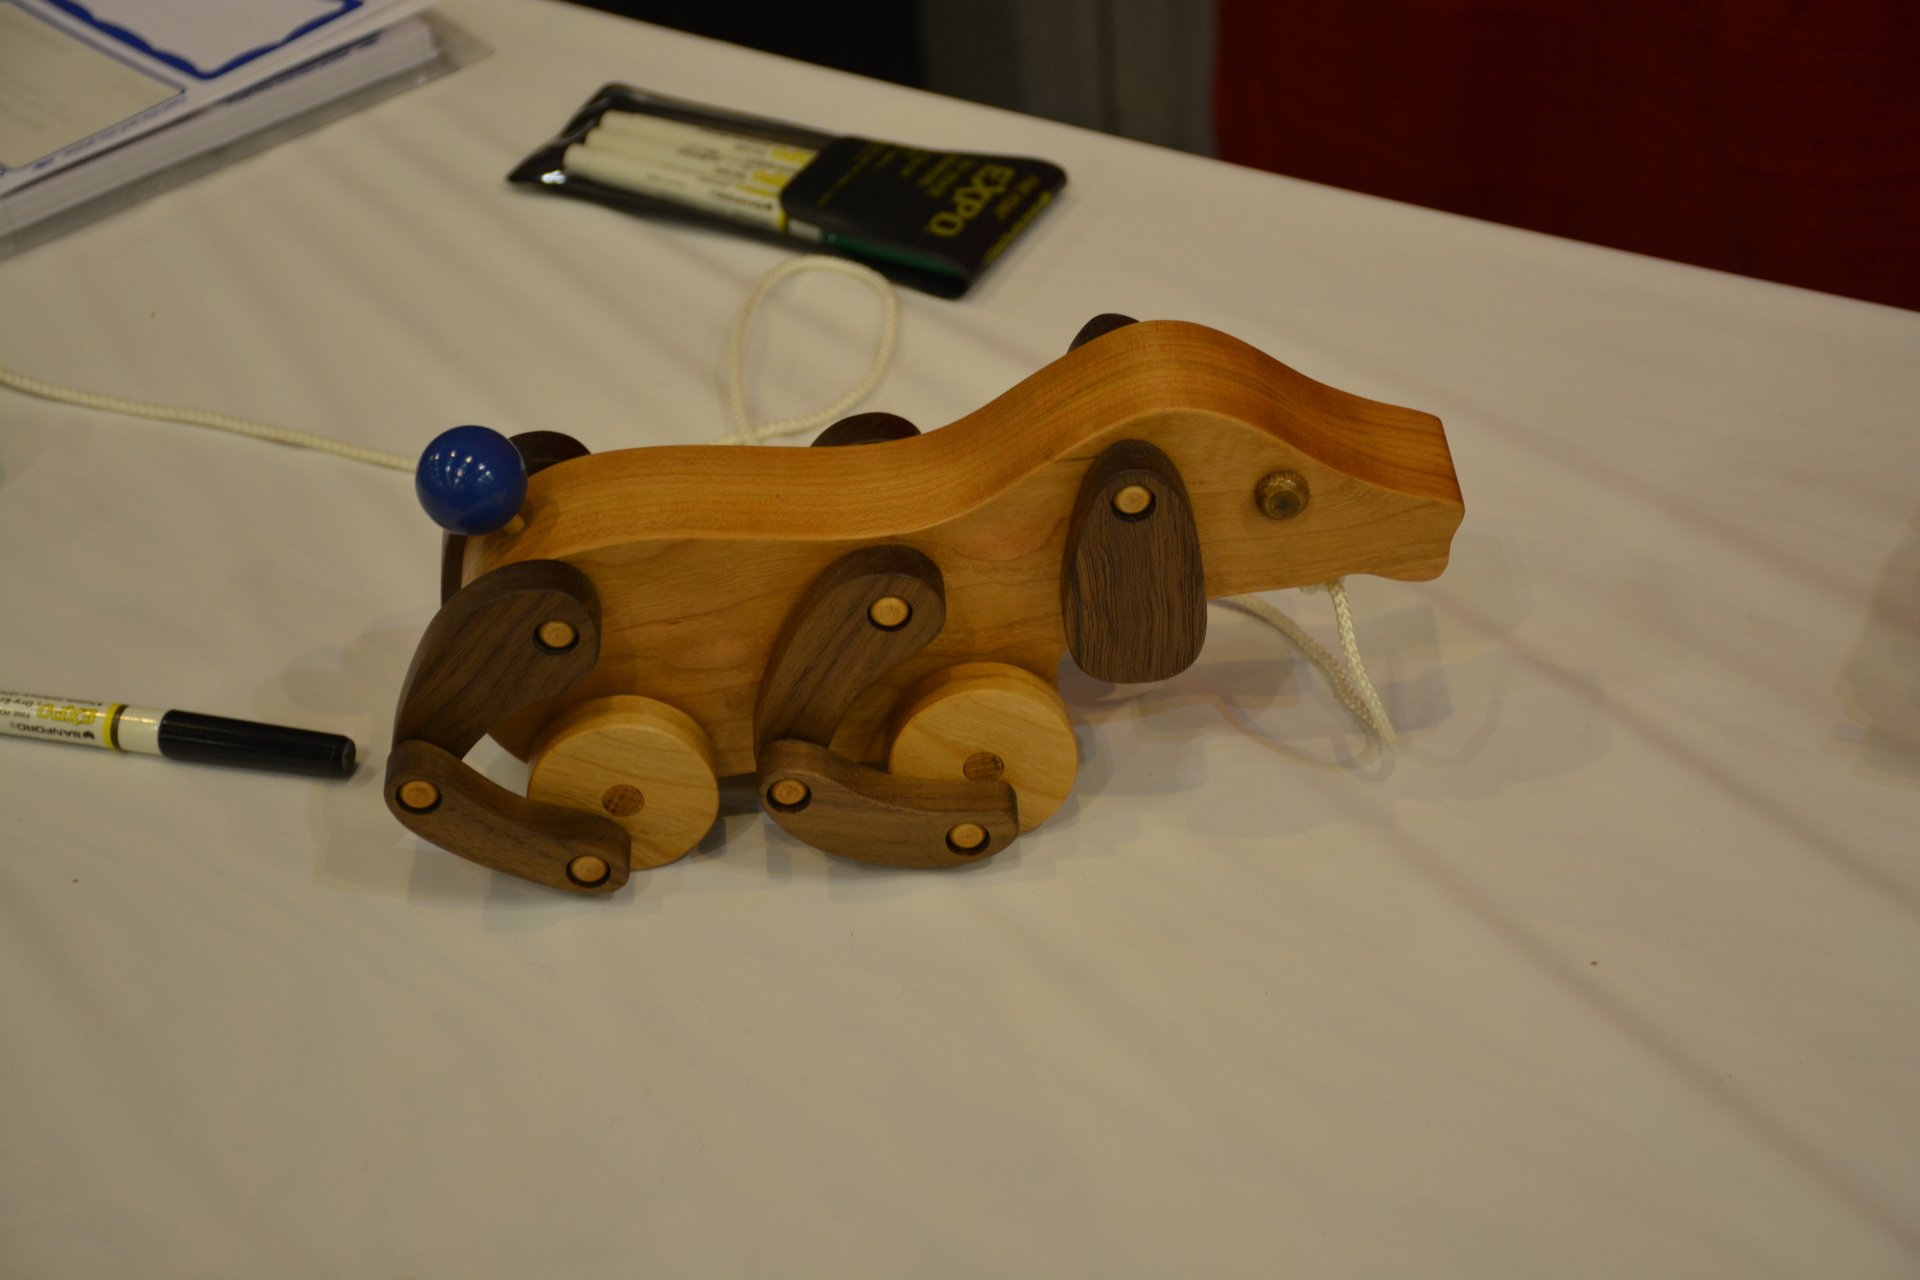
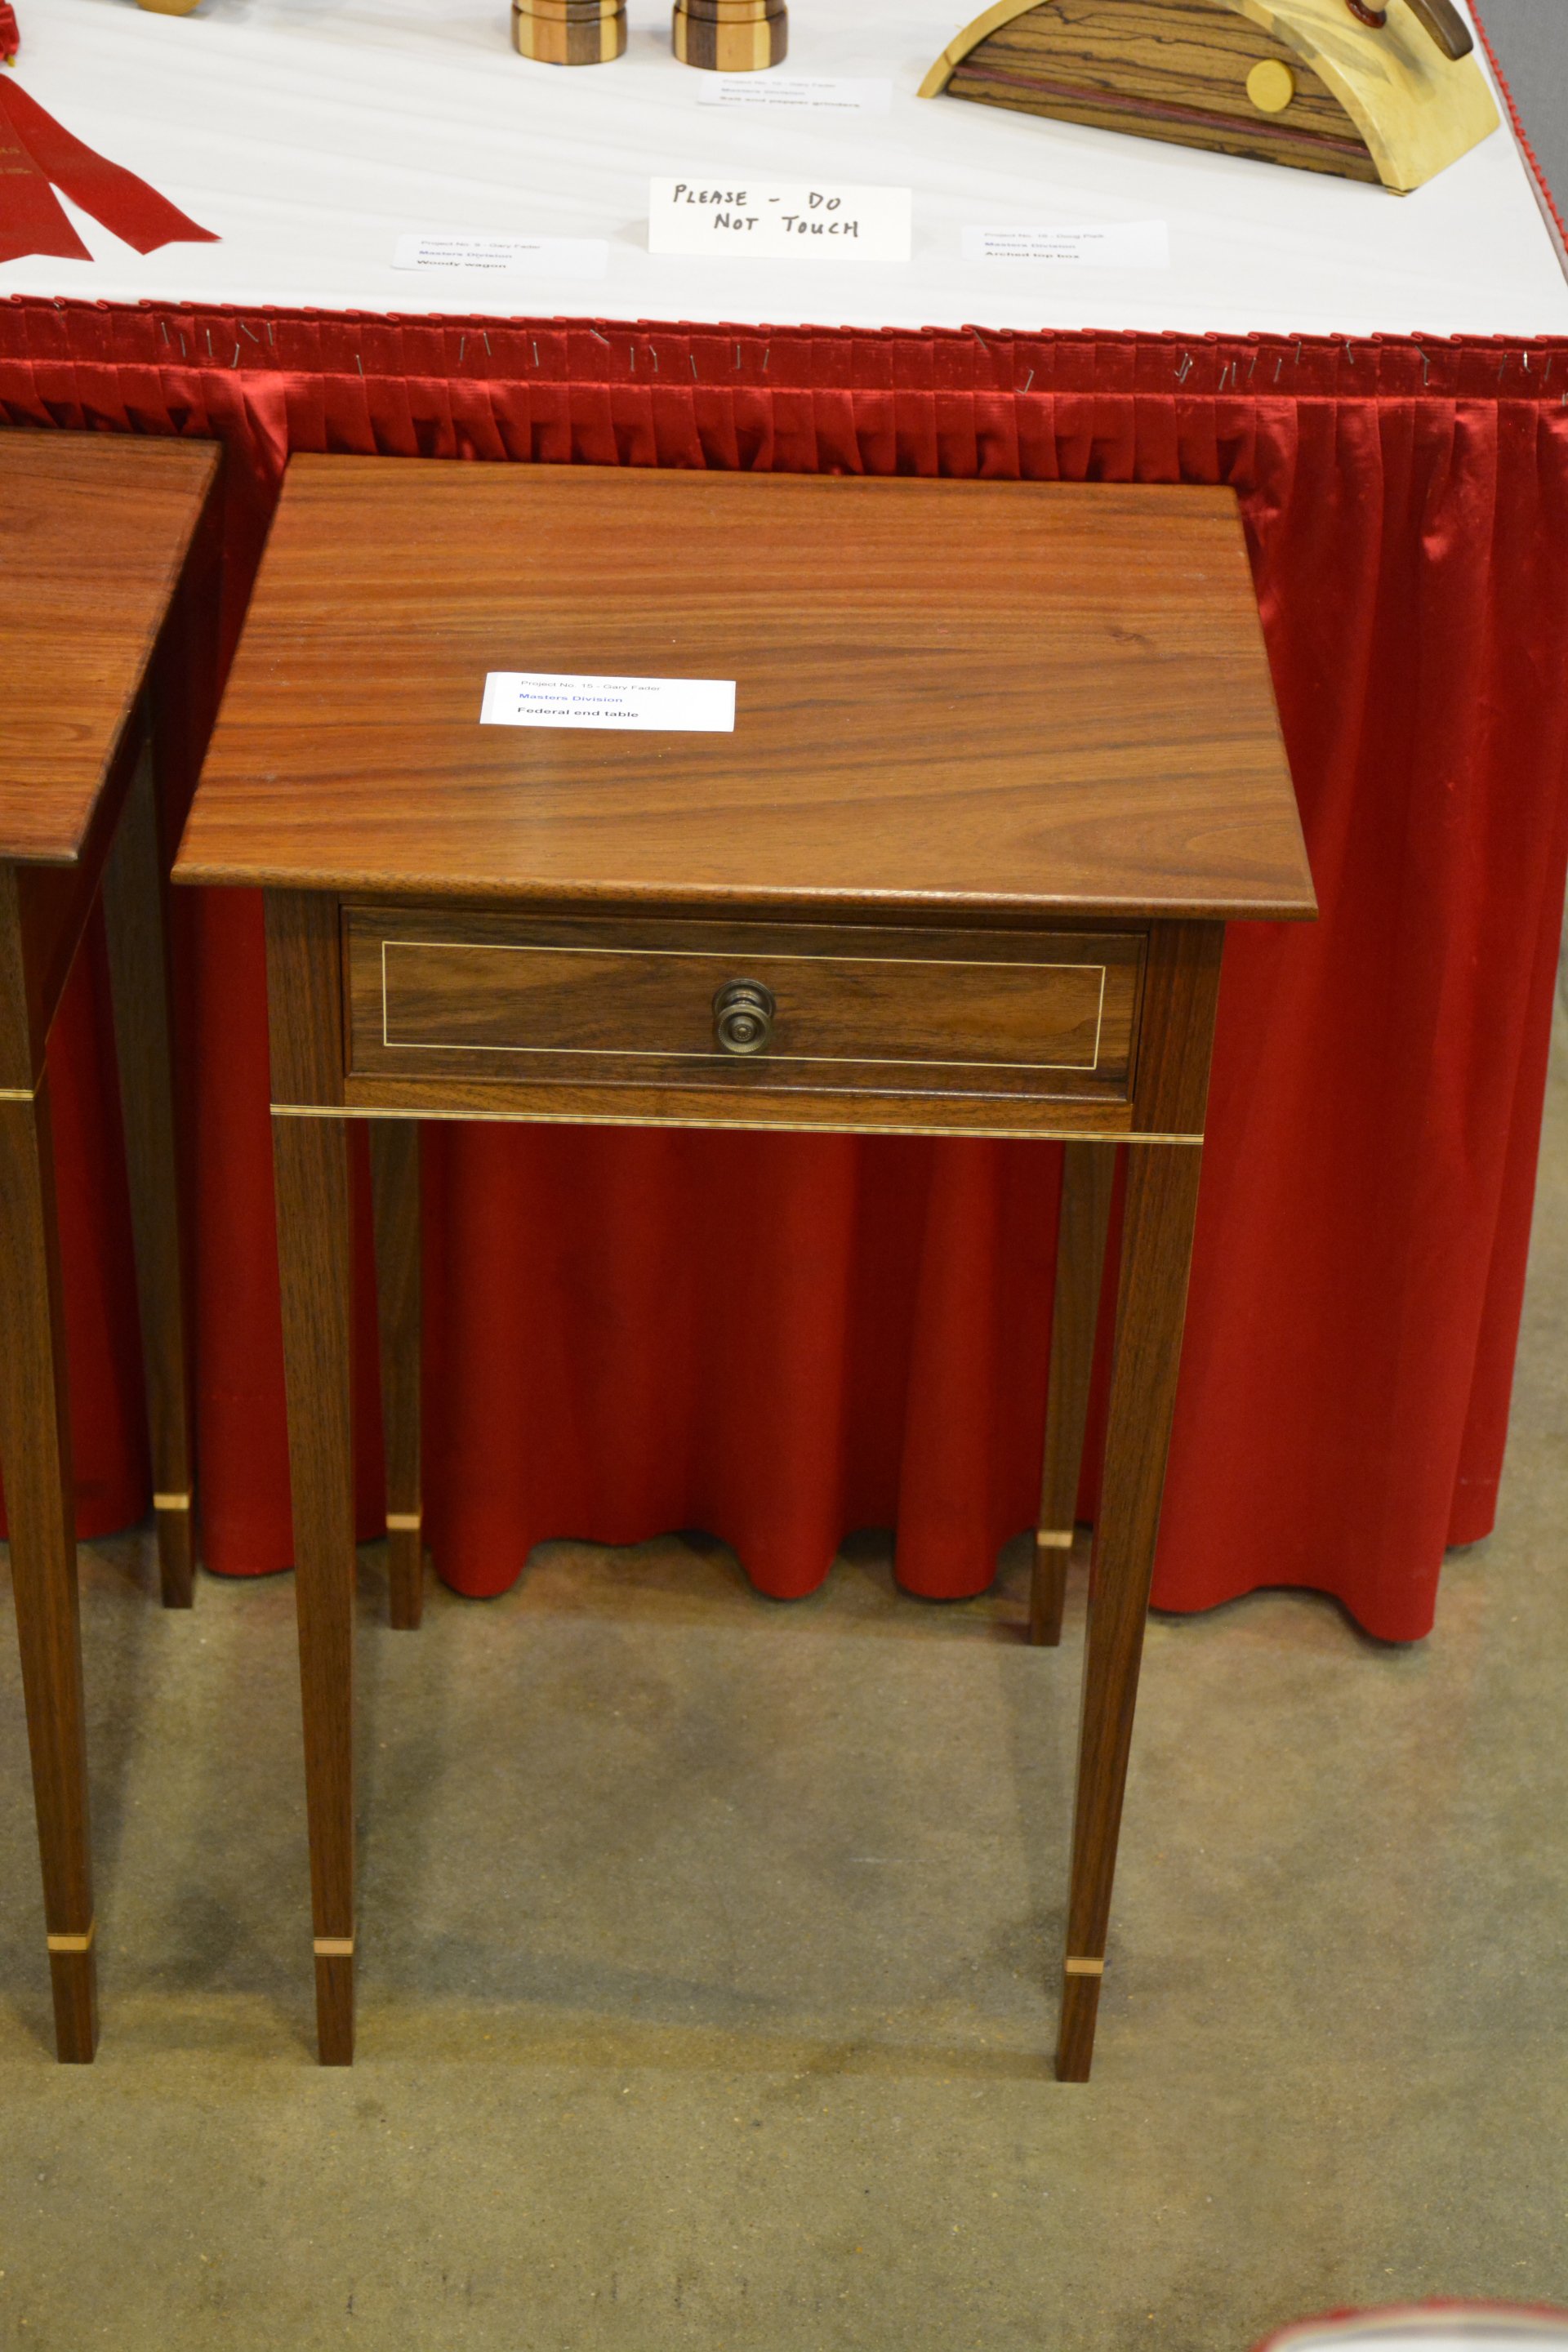
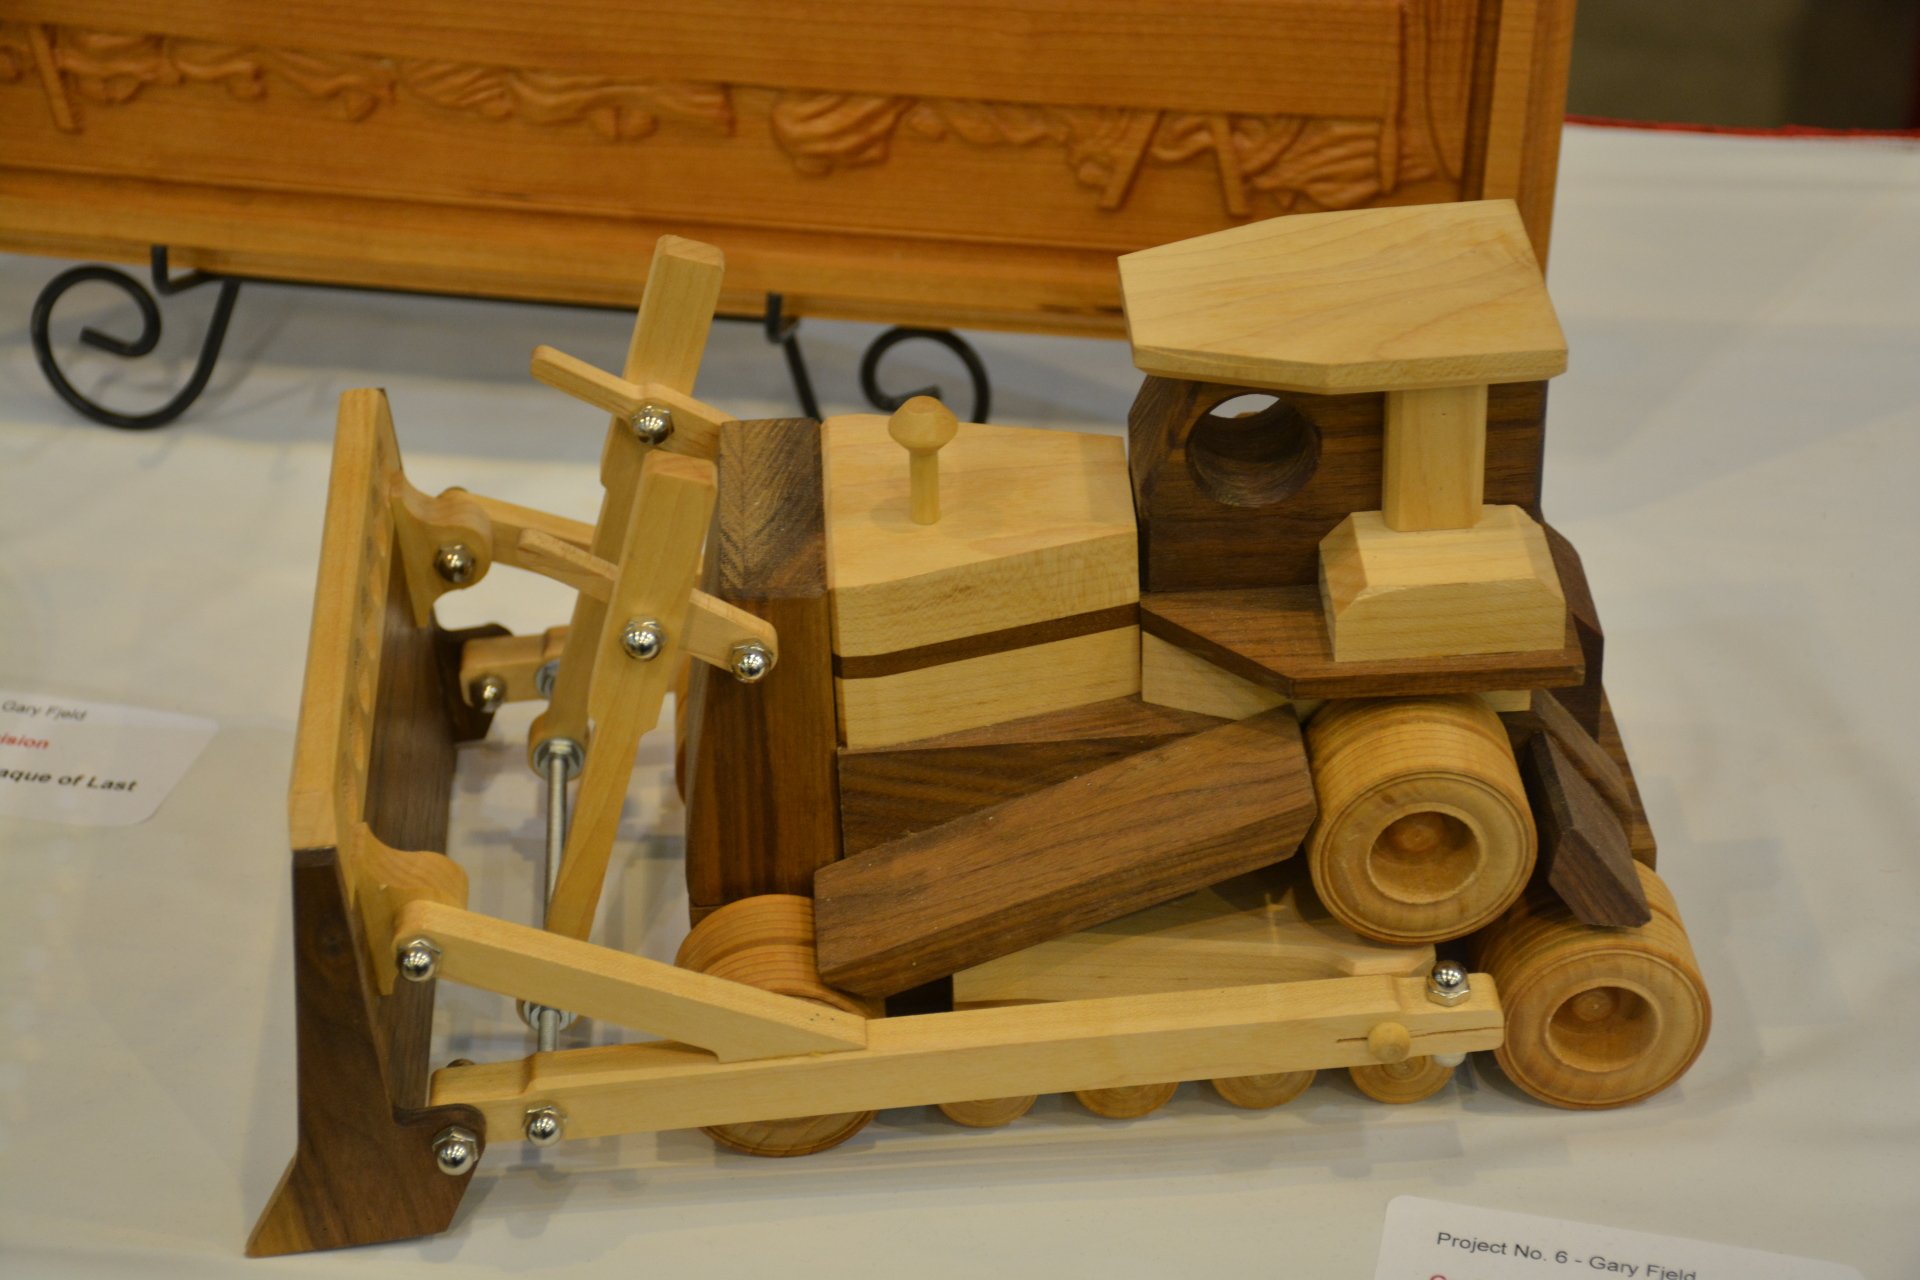
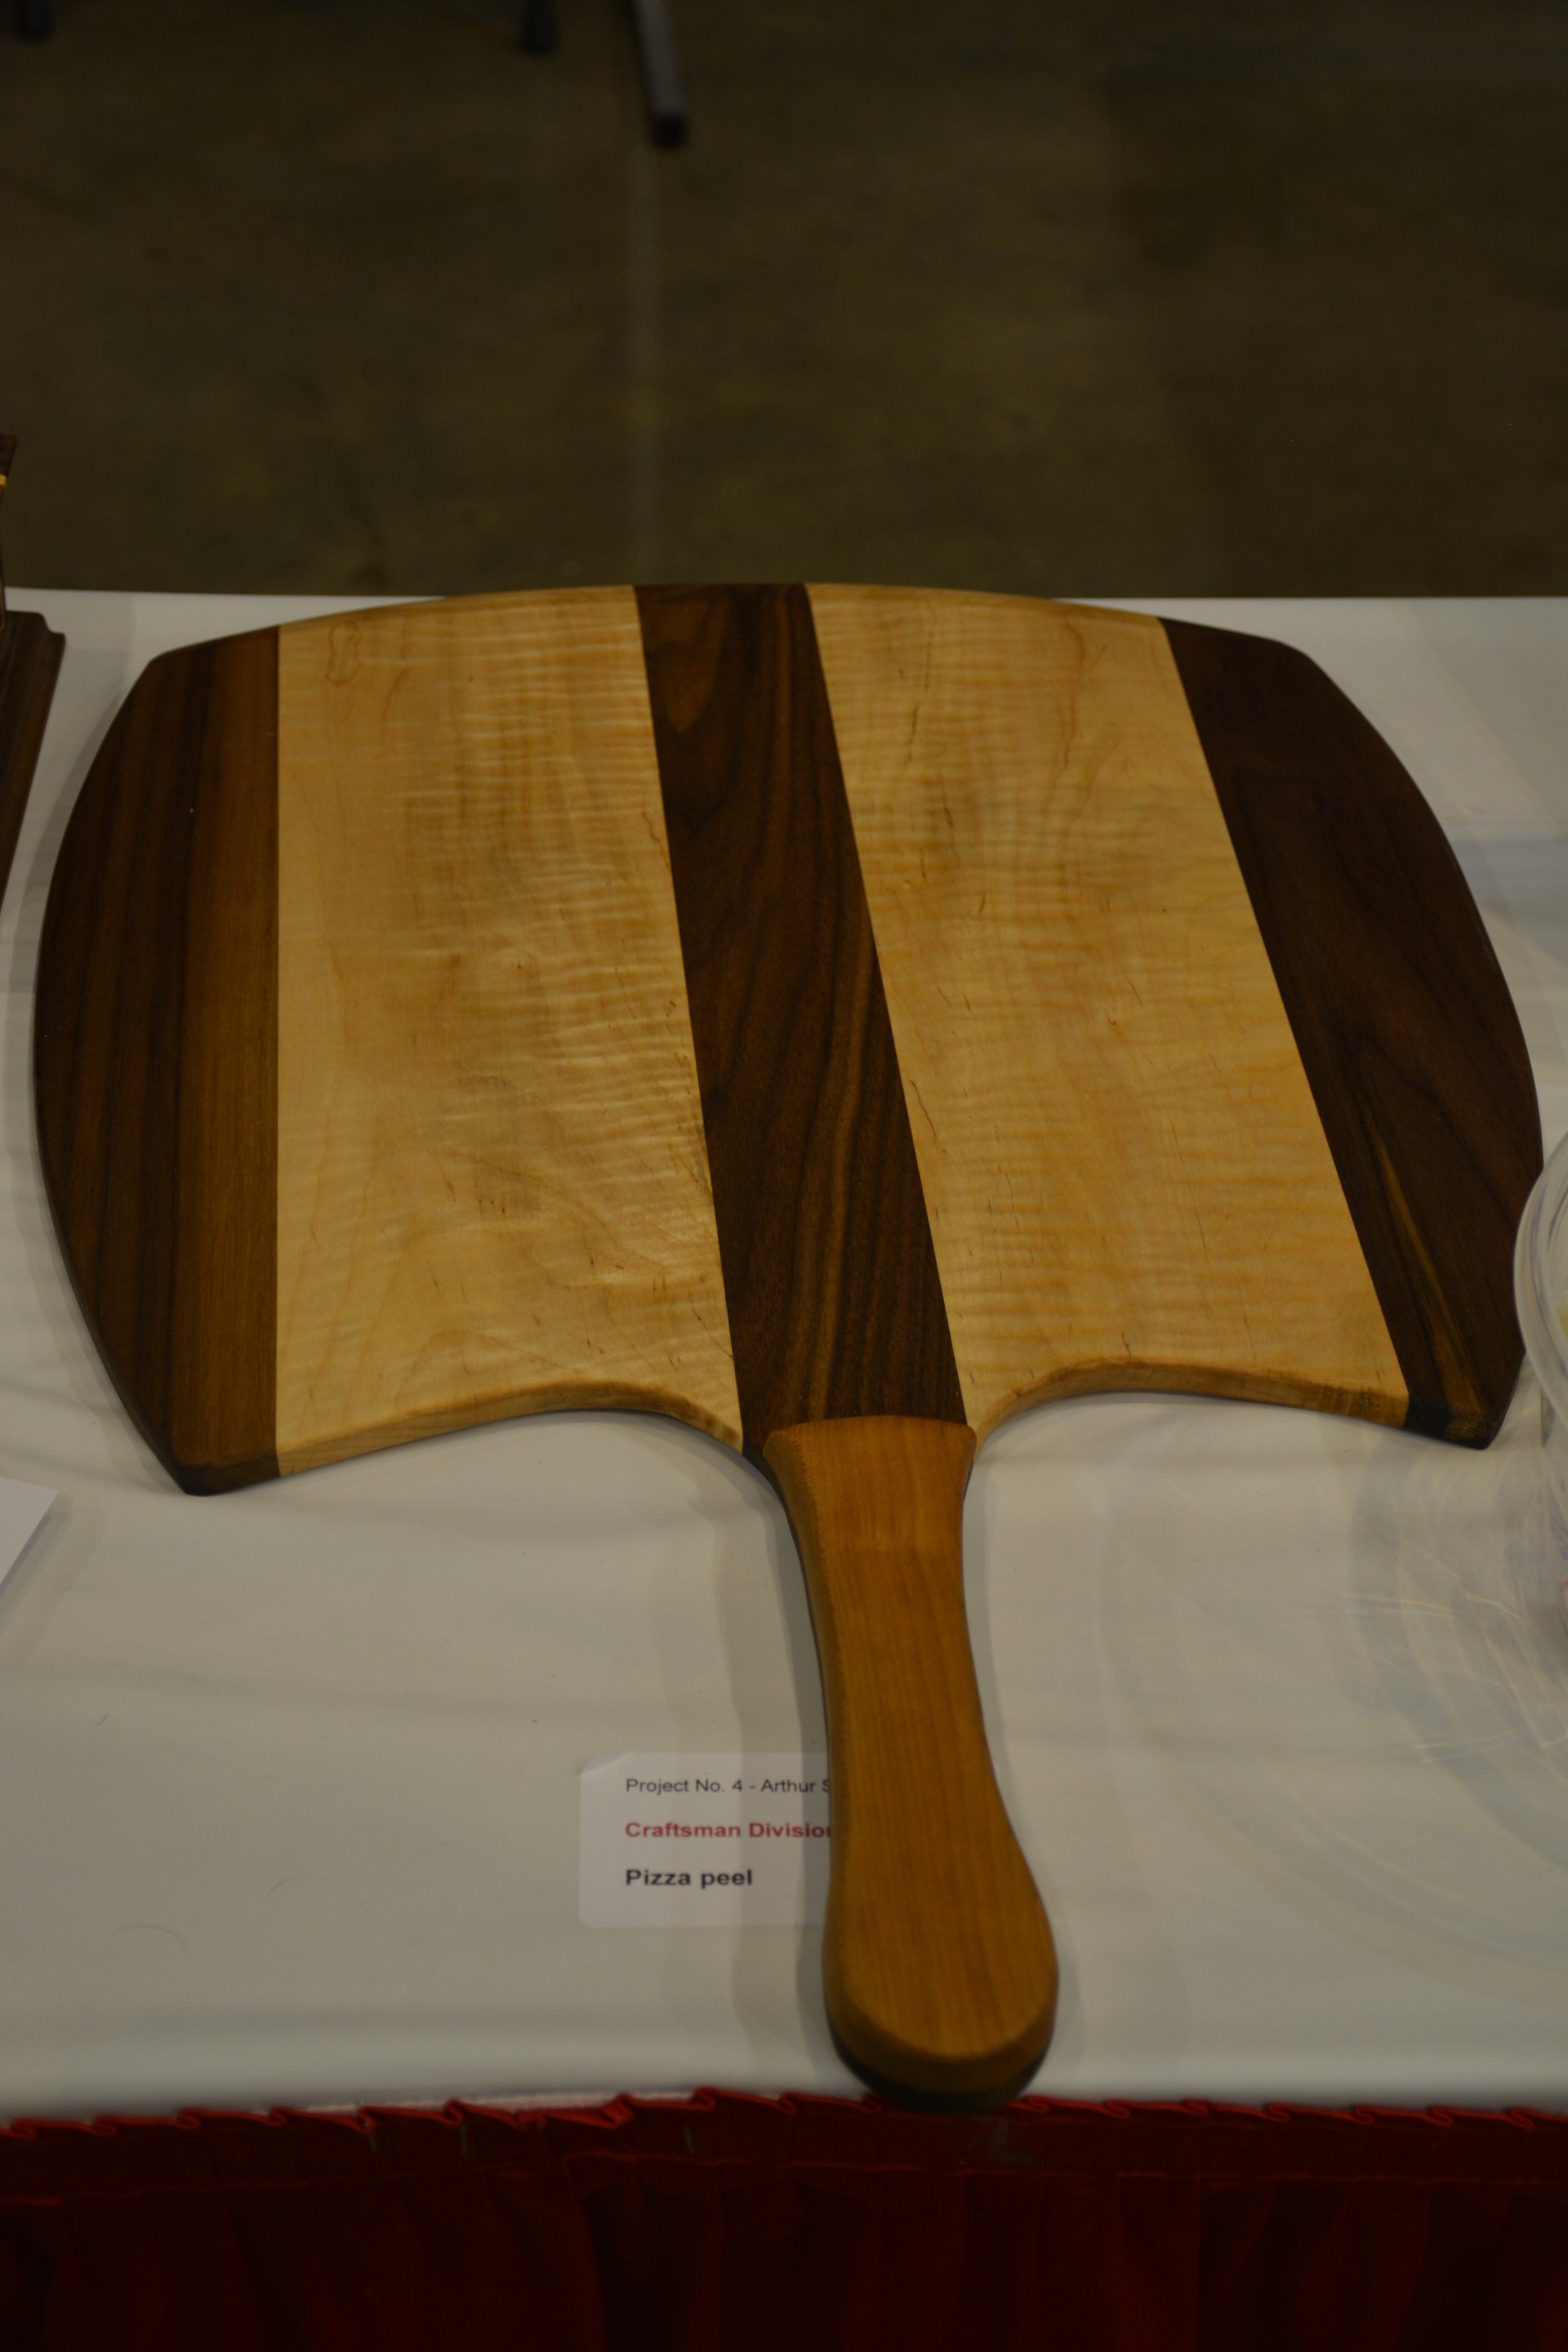
The Guild Holiday Party will be held December 10th, and The Woodworking Show 2019 is set for March 15-17 at the Cobb Galleria. The Guild will again have a Booth at the Woodworking Show, and will have a a judged contest of your projects in the Craftsman and Masters categories.
Show 'N Tell at the Holiday Party will also include Craftsman and Masters categories judged by attendees.
Details on the Holiday Party will be in the November Newsletter.
It is time to start planning and building!
For the Woodworking Show, you can get further details about the entry process on our website under Activities > Woodworking Show.
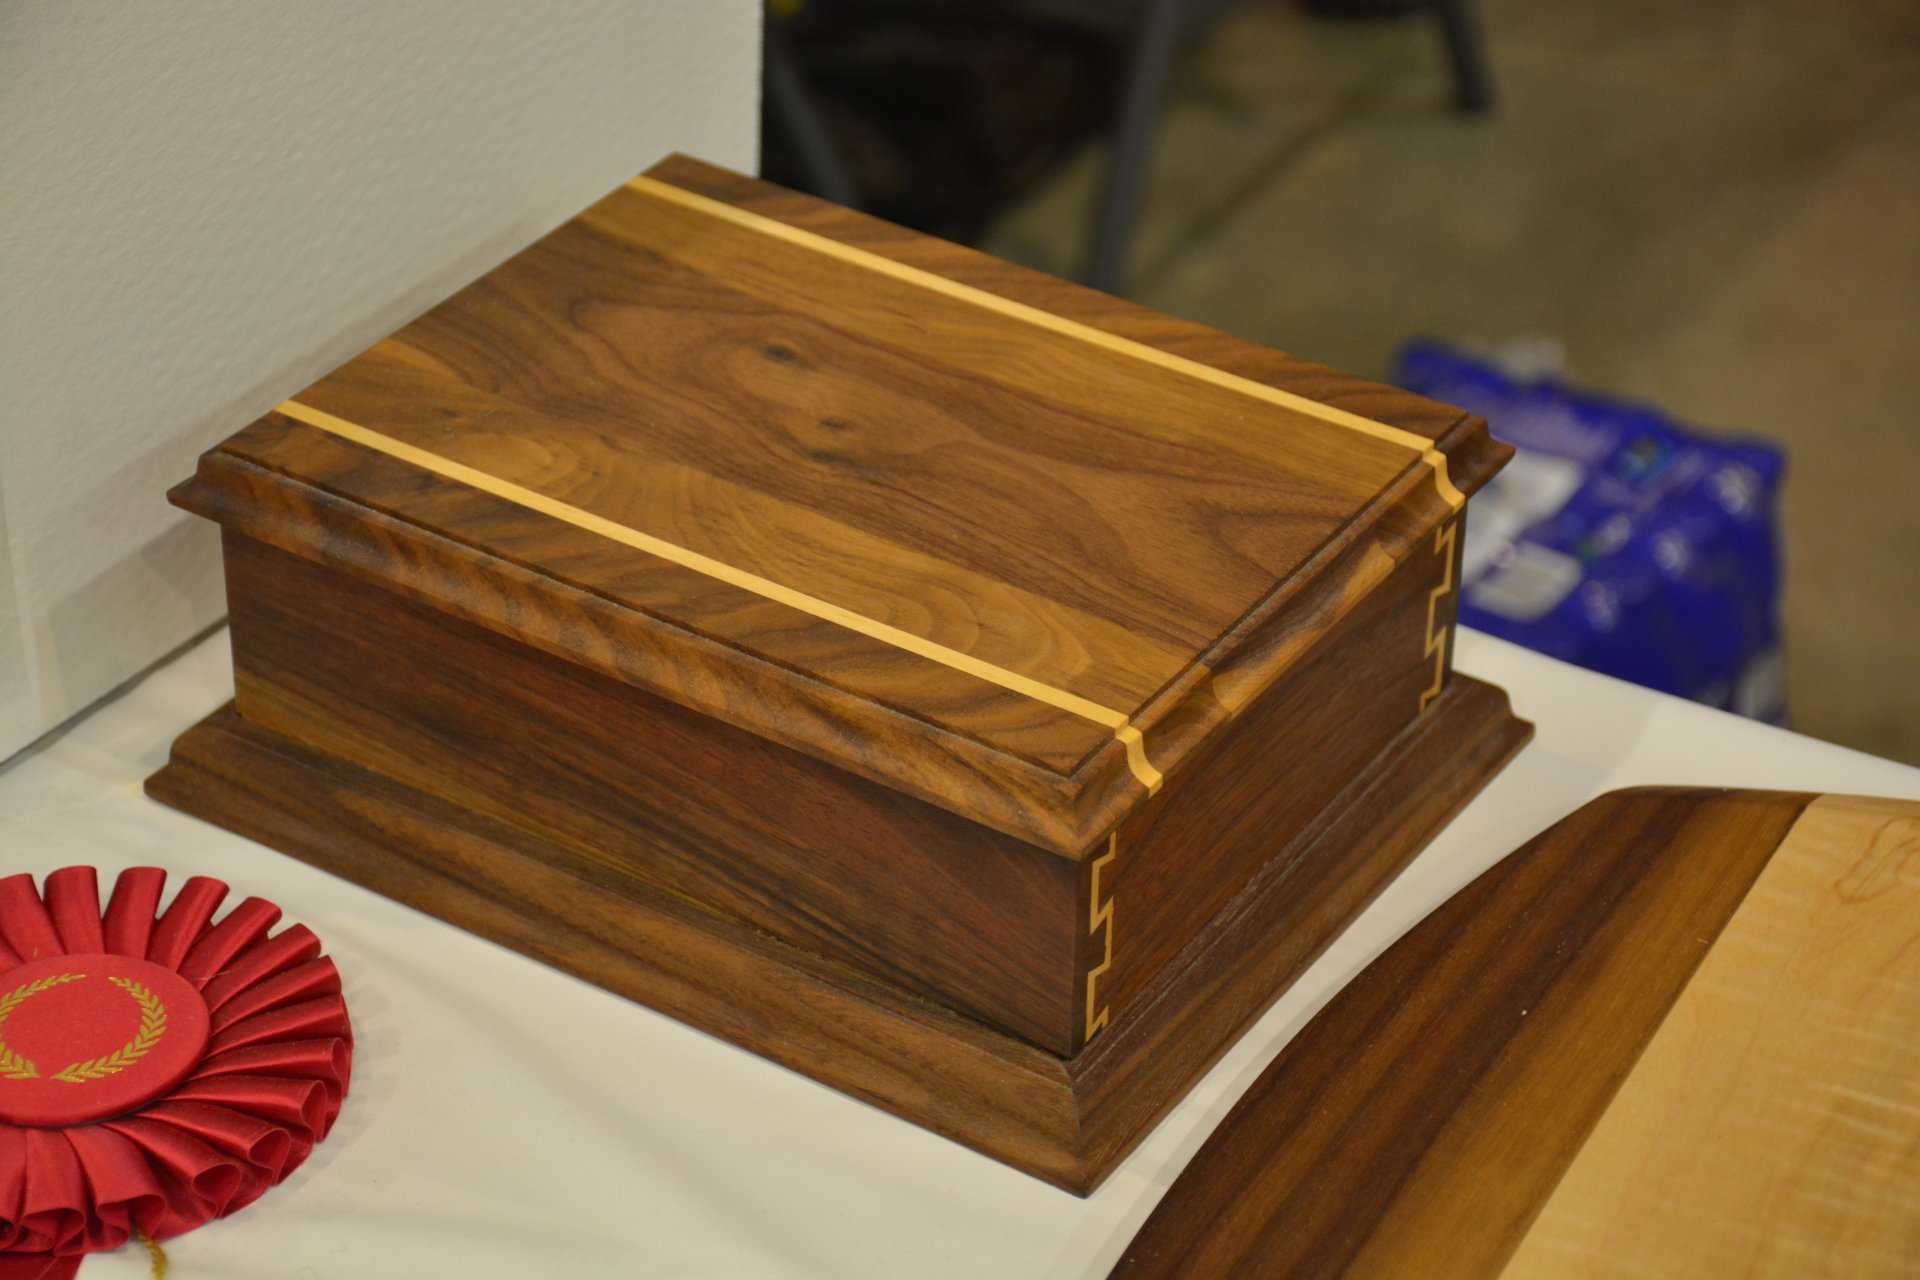
Shown below are some of the entries at the WW Show this past Spring.



Show 'n Tell
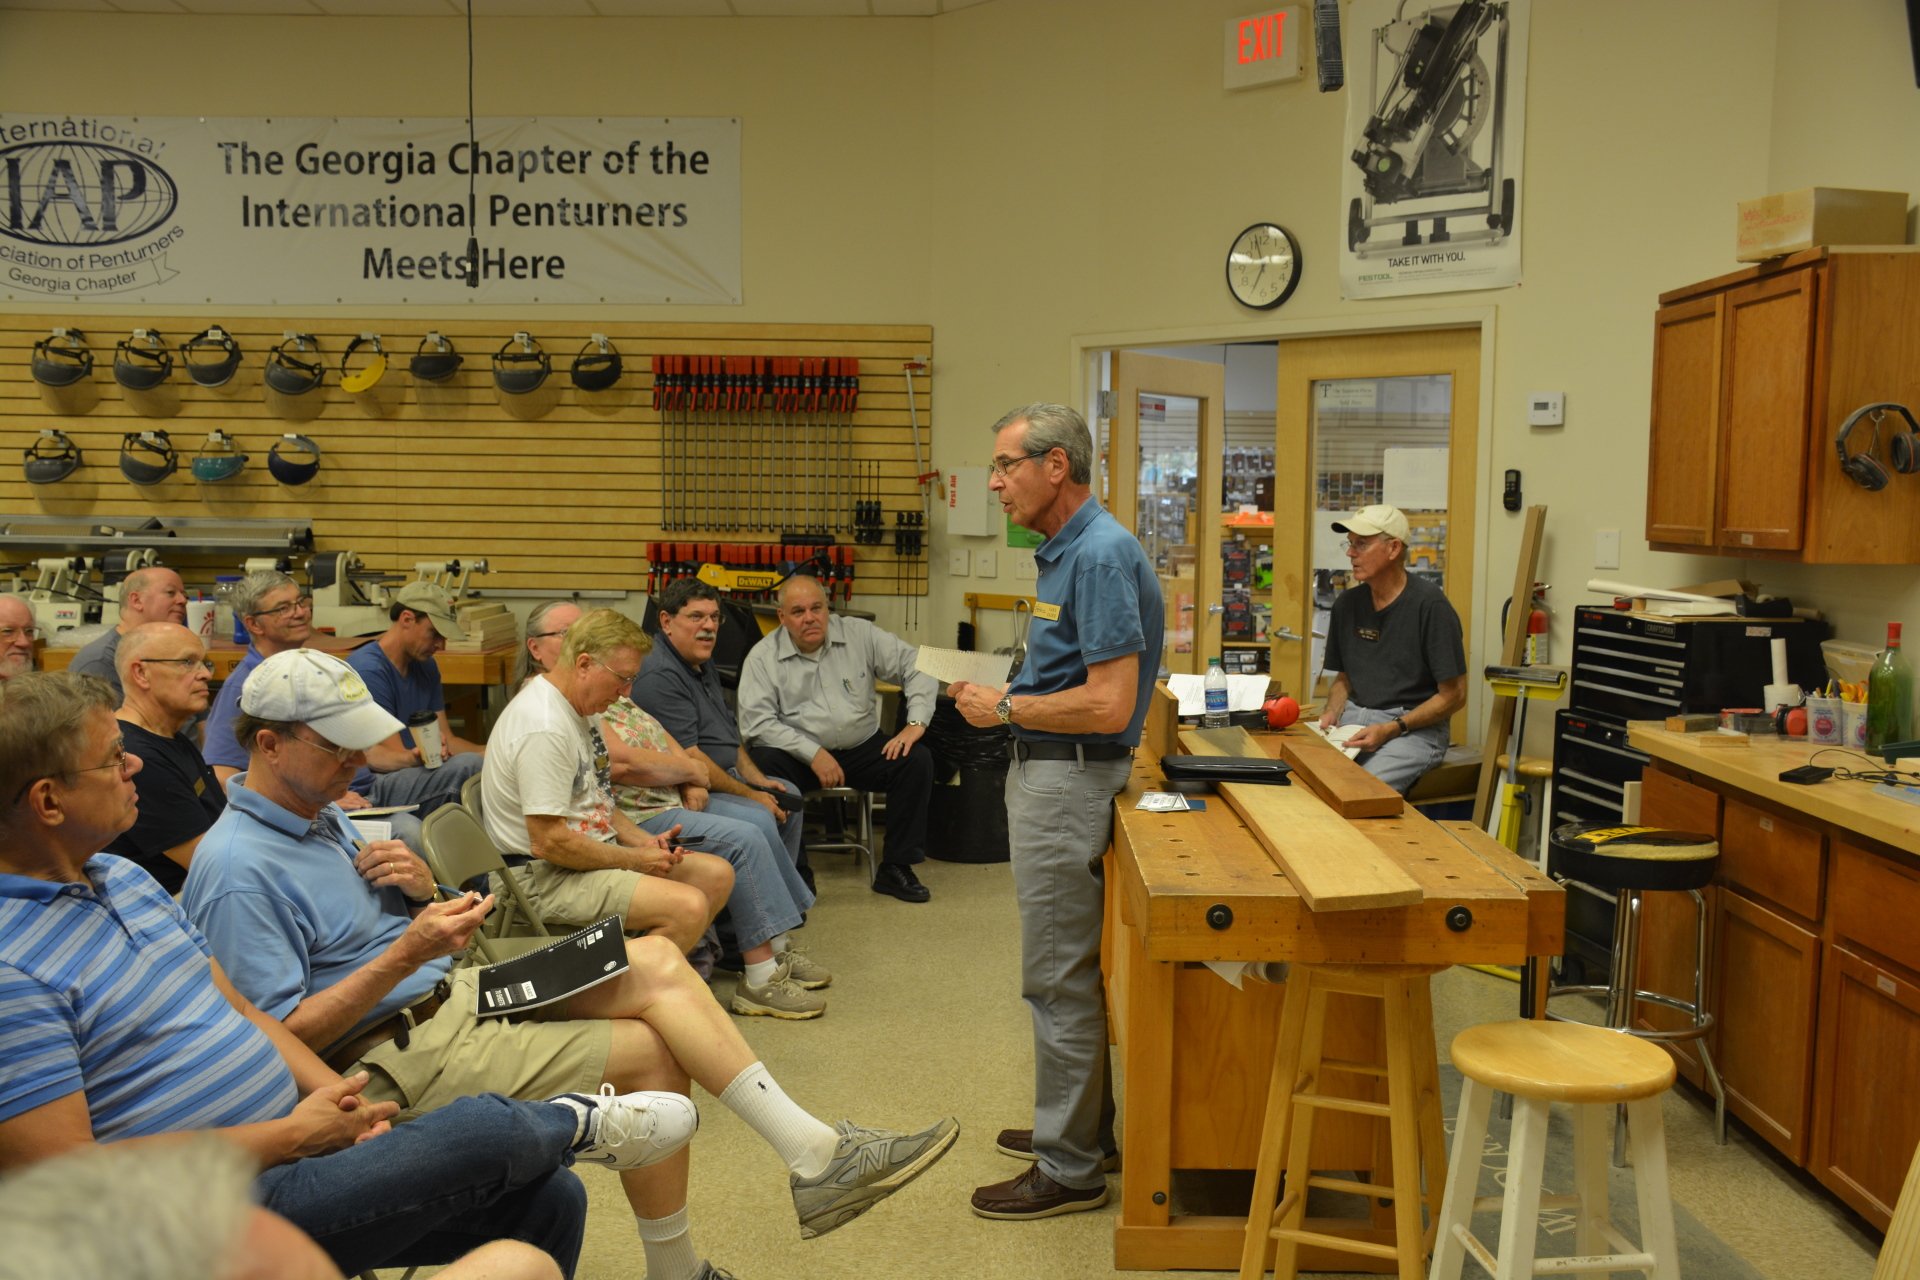
Kelle Risoli showed us some of her work in Miniature Woodworking to preview her
Meeting presentation.
Nicely Done, Kelle !
Bring Your Project(s) to Show 'N Tell
at the November 12th Meeting,
as Show 'N Tell will not take place at the October Toy Building or the Mini-Symposium.
Garvan Lowboy And Understanding the Carvings
Tony Kubalak
November 10-11, 2018
Workshop November 12, 2025
Sponsored by SAPFM Peach State Chapter
The 2018 Peach State Chapter fall program will feature Tony Kubalak on the Garvan lowboy/dressing table. The two day weekend presentation will be on Saturday and Sunday, November 10-11 from
9:00 AM - 5:00 PM (both days) at Woodcraft at 1085 Holcomb Bridge Road, Roswell, Georgia.
An optional one day intensive workshop will be on Monday, Nov. 12th. Tony has been to Peach State SAPFM before when he did a presentation on the Newport tea table. Tony is an accomplished maker, writer and presenter. This year he will focus on the lowboy attributed to the “Garvan carver” which is currently in the Minneapolis Institute of Art (MIA). Tony has written two books on carving: “Carving 18th Century Furniture Elements” and “Carving 18th Century Furniture Motifs”. You can learn more about Tony at www.tonykubalak.com.
The focus of the program can be summed up as “What information can you derive from photographs that help explain the carving, and how do you translate that into the actual carving”. We can think of no finer example to work on than this outstanding lowboy.
Saturday and Sunday: The program will be a combination of presentation, slides, demonstrations and questions and answers. The session will begin with a slide presentation showing construction sequence for the entire piece. Tony will discuss and demonstrate how to “read” photographs of carvings and looking at “layers” of the carving.
Tony will use some of the elements of this lowboy as case studies for the process of reading the carving details. Elements that he will examine include: Front and/or side rail carvings, central drawer, knee and quarter column. In each example he will describe what he sees in the photos and how to implement it in wood. Tony will then demonstrate the specific process he uses to transferring a carving from a photograph onto a knee of a leg. Other demonstrations include feathering on skirt molding, and the layout and treatment of the edge molding on top.
All demonstrations will start with a slide presentation showing the process from beginning to end. Tony will have a roughed-out sample that he can then demonstrate the detail carving. Elements that will be included in the demonstrations include: Central drawer shell; Central drawer applied vine; Front and/or side rails; Knee; Quarter column; Top molded edge. Fee for the two day weekend presentation is $120.
Monday Intensive Study of Carving
The Monday session will be a continuation of the the weekend carving study with a more personal interaction with Tony on varying specifics of his techniques and observations on developing a plan for reproducing complex carvings from photographs.
A registration form must be returned with payment in order to complete your registration. Registration forms for those
who do not get the newsletter may be obtained from our website www.peachstatesapfm.info/registration.
This
program is open to SAPFM and Georgia Woodworkers Guild members. You can join SAPFM on-line at www.sapfm.org for a $60
annual fee which includes the annual publication “American Period Furniture”, access to numerous plans, most for free,
and access to the Peach State Library of photos and videos from our past presenters.
Woodworkers Guild of Georgia
Upcoming Events
Monday, October 8
Charity Toys Assembly Woodcraft - Alpharetta 7:00 PM
( No formal Meeting or Show 'N Tell )
Saturday, October 13
Fall Mini-Symposium Suwanee Lumber - 9:00 AM - Noon
Cabinet Making with Paul Fussel
Registration, Coffee & Donuts at 8:30
Saturday & Sunday, November 10 & 11
SAPFM Event
Garvin Lowboy and Carvings with Tony Kubalak
Woodworkers Guild Members Welcome - See above Article
Monday, November 12
Monthly Meeting Woodcraft - Alpharetta 7:00 PM
Creative Design in Woodworking with Doug Pisik
Monday, December 10
Guild Holiday Party
North Atlanta Seventh Day Adventist Church - Dunwoody
Free Demonstrations
Rockler 6690 Roswell Road / Sandy Springs
&
425 Ernest Barrett Pkwy / Kennesaw
Oct. 6: 11:00 Pen Turning
Oct. 13: 11:00 Arbortech Power Sharpening
Oct. 20: 11:00 SawStop Table Saw Demo
Oct. 27: 11:00 Hand Tool Techniques
Nov. 3: 11:00 Spray Finishing Techniques
Woodcraft 8560 Holcomb Bridge Road / Roswell
Oct. 6: 1:00 Pen Turning
Oct. 13: 1:00 SawStop Table Saw Demo
Oct. 20: 1:00 Intro to Knife Making
Oct. 27: 1:00 Applying a Finish - Techniques
Nov. 3: 1:00 Wood Grain Filling
Trading Post - Buy and Sell
The Guild Website contains an interactive area for Guild members to place adds to Sell their woodworking related items, or Buy items that have been posted by others.
Trading Post - Buy and Sell is located on Message Board on the Resources Dropdown.
Click on http://wwgofga.com/forum/trading-post.html to go directly to the Trading Post
The Guild Board of Directors
Gary Fader President 770-977-7271
Art Sanders Treasurer 678-472-9117
Nuane Neely Community/Charitable Projects 770-922-1933
John Champion Woodworking Show 2018 404-307-0817
Tom Melcher Patron Sponsors 770-851-1098
Jim Milam Spring Symposium 2018 404-255-2314
Tom Risoli Website Administrator I 678-513-0887
Steven Sheppard Website Administrator II 770-316-7160
John Jones Vice-President, Secretary 678-576-7265
Jim Milam Member at Large 404-255-2314
Roger Moister Librarian 404-355-5033
Ken Kraft Membership 262-894-1725
Joe Rodriguez Scholarships 224-659-2225
Mark Haugland Newsletter 678-294-8043
Jim Wright Audio Visual/Member at Large 770-973-4692
John Jones Communications 678-576-7265
Ken Gregg Program Committee Chairman 678-799-6157
Support Your Woodworkers Guild of Georgia Patron Sponsors
Proof of Guild membership is required by
Patron Sponsors
that offer discounts. Your membership card can be printed from our Guild website. Login and go to Guild Info > Members Only, and click on Membership Card. If you would like to pick up your membership card at the next Guild meeting, email us
with your member name.
CAG Lumber - CAG Lumber is known for the largest selection of live edge slabs and unusual woods from all over the world.
We sell on the net, not the gross, so you take home what you pay for with no added on or hidden fees. We can saw your logs, kiln dry, resaw lumber, plane, straight line, and glue up ready. We are large enough to handle your needs and small enough to give one on one personal service. Guild members show membership card to receive 10% off most items, except items on clearance or discounted. Check out our web site, we stock a lot more than is listed. Website
Fintech Abrasives - For over 25 years, Fintech Technologies has been fabricating belts, sheets, rolls and other abrasives. They also have extensive experience with the application of the newest materials in coated abrasives. Family owned and operated in Belding, MI, Fintech is a highly respected company that takes pride in its excellent product quality, unmatched customer service, and superior technical support. Guild members are welcome to order products, as well as contact them with questions. Call them at 1-888-223-8768.Website
Highland Woodworking - Providing fine woodworking tools and project supplies since 1978, Highland defines itself as a learning community. The store has attracted nationally known teachers and authors including Tage Frid, Sam Maloof, Michael Dunbar, Rude Osolnik, Toshio Odate, Dale Nish, Mark Duginske and many others in Highland’s ongoing program of seminars and workshops. We have some great woodworking class opportunities coming up at Highland Woodworking! We have classes and seminars every week that include basic sharpening techniques, turning, finishing, project builds, and much more! Click to see our class schedule.
Their catalog of fine woodworking tools and workshops is available online, or visit its fully-stocked store at 1045 N. Highland Avenue in Atlanta, 30306. 404-872-4466. Website
Peach State Lumber Products - We are dealers of high grade/cabinet quality hardwoods, plywood, softwood, veneer and also carry a full line of cabinet grade plywood and turning blocks. We welcome small quantity orders and have a retail sales area open to the public. We also carry Hettich brand hinges and drawer slides. We have hardware screws and pocket hole screws. We now have live edge slabs in multiple species, great for bar tops, mantels, etc. Show your Guild membership card to receive their 500 b.f. price on any qualifying purchase.
Located at 4000 Moon Station Road, Kennesaw, 30144. 770-428-3622. Website
Peachtree Woodworking Supply -
Peachtree is a producer and retailer of high quality woodworking products with a goal of providing the woodworker with the hard to find tools and accessories. They stock over 6,000 different woodworking items. Those items include a wide selection of abrasives, books, DVD’s, clamps, router bits, glue, t-track, dust collection, and much more. Peachtree also carries the major brands. The store is located at 6684 Jimmy Carter Blvd., Suite 100, Norcross, GA 30071, 770-458-5539. Store Hours: Mon – Fri 9 am.- 5 p.m., Sat 9 am - 3 pm. Website
Redmond Machinery - Specializes in new and used woodworking and metal working machinery in a 25,000 square foot showroom. We stock machinery, accessories, and supplies from top-name manufacturers. Bargain hunters, check out our large inventory of used and scratch and dent machinery and accessories. We are a source for older American made Powermatic and Delta parts. We invite Guild members to stop by to visit us. We are located at 58 Weldon Rd., Palmetto, GA 30268, 770-683-7297 or 800-428-9898 Website
Rockler Woodworking and Hardware
- (Two Locations) - Rockler began as a mail order woodworking supply company and today the retail chain stretches across the United States. Our magazine, Woodworker’s Journal, is dedicated to offering plans, techniques, product reviews and tips to woodworkers. Our goal is to be your go-to woodworking resource. Please mention you are a Guild members BEFORE your purchase to receive 10% OFF everyday (normal exclusions apply).
We invite you to visit us at 6690 Roswell Road in Sandy Springs 404-460-1000, OR 425 Ernest W. Barrett Pkwy in Kennesaw 678-383-0087. Hours are Monday-Friday 9 am to 7 pm, Saturday 9 am to 6 pm, and Sunday 11 am to 4 pm. On Saturdays we have free demos. Website
Suwanee Lumber Company – Is a specialty hardwood supplier for custom cabinet and furniture makers as well as the general public. Suwanee features hardwood lumber with matching plywood and other materials to make every project a work of art. Please show your Guild membership card when shopping to receive Level 4 pricing (1,000 b.f. pricing).
Their location is 540 Satellite Blvd. in Suwanee, GA 30024. 770-945-2102. Website
Woodcraft - (Two Locations) – Has been a woodworker's favorite source for quality hand and power tools, equipment and supplies (including wood). Cabinet makers, wood turners, carvers and woodworkers in general rely on our friendly, experienced staff that is always available to help with the selection of tools and supplies as well as provide helpful advice on individual projects. We have fully equipped classroom facilities. Guild members receive 10% OFF qualifying purchases during our monthly Guild meeting or Symposiums at the Alpharetta store.
Stop by our store at 8560 Holcomb Bridge Road in Alpharetta, GA 30022, 770-587-3372 OR our West side Store at 351 Thornton Road in Lithia Springs. GA 30122, 770-485-5636. Website
The Woodworkers Guild of Georgia
Newsletter is published monthly, and is provided to all Guild members.
The Newsletter, and its archived copies, is posted on our website.
It is also available 24/7 on our Newsletter URL wwgga.tlehs.com
If you have questions, wish to contribute an article, etc., please use Feedback form below
The Guild welcomes everyone interested in fine woodworking to join. Annual membership dues are $45.00,
which can be paid at the monthly meeting (2nd Mondays) or mailed to:
Woodworkers Guild of Georgia / P.O. Box 1323 / Woodstock, GA 30188
You may also pay dues using PayPal at wwgofga.com
Enjoy Your Newsletter. We Welcome Your Feedback.